Updated Sep 03,2024
Enterprise

The Ultimate Guide to 360-Degree Product Photography: Techniques, Tools, and Tips for Stunning Visuals

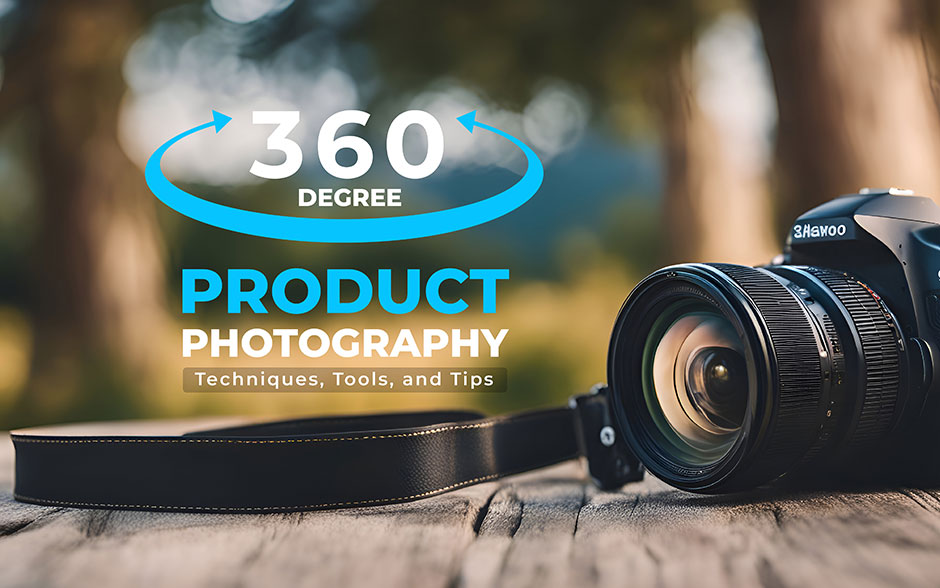
Have you wished your customers could examine your product as closely as they can in a store? Imagine them seeing even the tiny details, such as the design up close or the size overall, all from the comfort of their couch. That's the magic of 360-degree product photography!

E-commerce product photos these days need to be excellent and eye-catching. However, standard pictures can only do so much. That is the whole aim of 360-degree photo technology—to bridge the gap between stores and online shopping with an immersive experience built on trust and means to make people buy more.

In this guide, you will find everything you need to know about shooting perfect 360-degree product images. Taking the picture will take you from a selection of the camera and installation of the lights to the other aspects of the project and a few final touches. This way, by the end of this, you will be able to come up with incredible product presentations that make people wish to know what you are offering for sale.

Understanding 360-Degree Product Photography

ultimate guide to 360 degree product photography

Imagine you want the customer to experience all angles of a product, such as a neat new water bottle. Here's how 360-degree product photography comes together:

Step 1: Picture-Taking Machine: A unique stand rotates the product slowly like a merry-go-round.

Step 2: Click, Click, Click: The camera snaps many pictures of the product, one after the other, from different angles as it rotates.

Step 3: Stitch the Sides Together: The software then puts all those pictures together like puzzle pieces to create one complete 360-degree view.

Step 4: Look at that! A Spinning Bottle: Now online shoppers can spin the image, seeing the water bottle from all desired views, just as they could in person at the mall. 

Basically, it's just like taking loads of pictures of the product from all parts and then sticking them together to see the whole thing in one go!

Planning Your 360-Degree Product Photo Shoot

Well, we are going to dive right into 360-degree product photography. But let's get a little prep work out of the way first. In this guide, we'll take you through the steps to plan a successful 360-degree photo shoot to set you on the right path for maximizing this cutting-edge technique and amplifying your e-commerce presence.

1st Step: Finding the Right Products

Not every product is a perfect fit for a 360-degree shoot; here's where to begin:

  • Complexity: Products with complex detail, more than one visible side, or three-dimensional properties will benefit the most from this format. Think footwear, jewelry, handbags, or furniture.
  • Target audience: Identify your ideal customer. For products that are very dependent on visual details, 360-degree photography can be character-changing.

2nd Step: Goal and Objective Setting

What are you trying to achieve by taking 360-degree photos? Here are some of the specific goals to consider:

  • Make Products More Engaging: Allow a customer to interact and explore a product.
  • Reduce customer returns: Detailed view can also allow the eradication of purchase decisions based on the inaccurate perception of the product.
  • Enrich the brand image: High-quality 360-degree photos mean that everything corresponds to the professional and demanding approach to work.

3rd Step: Budgeting and Resource Allocation

Evidently, planning a budget is very important. Here is what to factor in:

  • Equipment: On your end, you will need a turntable, a camera, and proper lighting arrangements. Perhaps you would have to hire the kit ad hoc – which would include the kind found at Lane, where AIDS is used with discretion and in moderation.
  • Software: Make sure that you purchase software that will help you to interconnect seamless views of a 360-degree view as seen in the individual pictures.
  • Production: There are cases where the clothing item will need to be photographed for ghost mannequin purposes, so the price will depend on the type of clothing item. Read about what needs to be prepared and the pricing of product photography to seek a good package you can afford.

If you ensure that you carefully follow every procedure outlined above, you will be certain that your e-commerce business customers will be engaged with a perfectly executed 360-degree photo shoot.

Basic Tools and Equipment

So, we have an idea about what 360 photography is and have made all the main preparations for 360 product photography. So, let's move ahead in the process of 360-degree impactful images. The journey shall take us through the tools and equipment required to make an effective, seamless process of product photography 360 degrees:

Camera and Lenses

While a few unique 360 cameras exist, great results can also be achieved with a DSLR or mirrorless camera. Here is what to look for:

  • High-Resolution Sensors: The best camera for 360 photos will have high resolution and manual controls for shutter speed, aperture, and ISO. 
  • Wide-angle capabilities: Capture expansive scenes with ease.
  • Automated stitching features: Stitch processes together in a panorama without any effort.
  • Fisheye or wide-angle lenses: Set the camera to panoramic mode.

Turntables and Rotation Devices

The turntable is considered the heart of your 360-degree setup. Motorized platforms smoothly rotate your product, perfectly allowing you to capture a series of images later to be stitched into one 360 image. Sizes and weight support capacities are available. Consider these factors:

  • Smooth, automated rotations: Ensure smooth and steady results without much hassle.
  • Seamless transitions between frames: Ensure that there are no jumps or stutters in 360 images.
  • Premium quality: Improve the quality of your images with precise rotations.

Light equipment

One just simply must have even lighting to have a top-level 360° photo. There are several ways to accomplish this:

  • Softboxes, LED panels, and strobes: Versatile lighting options for different shooting scenarios.
  • Illuminate your objects/subjects from all directions: Sharp shadows and harsh lights should not be there, so the lighting should be even up to possible.
  • Textures and Details Pop Make your 360-degree visuals come alive with professionally done lighting.

Shooting and Editing Software

Taking pictures is only the beginning. You will need software that stitches the images together so that the joins are not visible in one seamless 360-degree view. Here are some of your software options:

  • Streamlined stitching processes: Seamlessly combine multiple images into a cohesive 360-degree view. 
  • Correction of lens distortions: Preserve accuracy and consistency in your images.

Anyway, with the right equipment and software, you can create an immersive 360-degree product experience to boost your e-commerce sales.

Setting Up Your Studio for 360-Degree Product Photography

It's time to set up an ideal studio. It is a tad exhilarating. Setting up a studio for 360-degree photography can considerably take your photography business to new heights. This allows complete imaging of the products. Potential customers receive a complete view of your items, enhancing their interaction and purchase rates. Properly developed images in a 360-degree format give a competitive edge so that your products are outstanding amidst a competitive marketplace.

Choosing the Space

This will be the key to everything; the best room for me is quiet and with low foot traffic, so I don't end up distracted, losing focus and attentiveness. There are a few things I need to consider:

  • Space: Ensure sufficient room for your camera setup, lighting equipment, and turntable.
  • Environment: There must be good ventilation and temperature control that ensures the room temperature is comfortable.
  • Walls: Walls painted in neutral color may help control unwanted color casts on your images.

Background and Preparation of Surface

A clean and professional space goes without saying; this brings the details of the product to life. I use seamless white paper or fabric for a clean background, which is more appealing as it allows for a sleek setup. Surface is also equally essential:

  • Background: It should be free of clutter, wrinkles, and dust.
  • Surface: Non-reflective to avoid glare, kept pristine to prevent imperfections in the images.

Positioning Lights for Best Outcome

Lighting is where the magic happens. Proper positioning will lead to high-quality images. I always go for a soft, diffused lighting setup:

  • Three-point lighting: Two lights at 45-degree angles on either side of the product, and one above or behind.
  • Experimentation: Experiment with moving around positions and intensities of the light to balance and highlight product features.

The setup of such a setting reduces the presence of harsh shadows and allows for even illumination, which is important in image optimization.

Setting Up the Turntable

The turntable is the central part of your 360 Photography setup. It must spin very smoothly and align itself well:

  • Placement: This is the studio setup, so it is the center and is, therefore, level and stable.
  • Rotation: Variable speed smooth and even if motorized.
  • Camera: Very nicely mounted and aligned about the center of the turntable.

Lighting Techniques

In simple terms, 360 photography is all about capturing every single aspect of your subject so that it looks perfect as viewed from every single angle. Whether you do each shot for eCommerce photography product 360, portrait photography, or real estate photo editing, getting the light right in all of them is also very important.

Diffused Lighting 

Softened, diffused light evens out all the subjects very well and provides no harsh shadowing. Use softboxes, umbrellas, or diffusers to scatter the light.

Backlighting 

Positioning the light source in the back of your subject may create a nice halo effect, separating it from the background and giving depth to the image. Just be careful not to blow out the highlights.

Fill Lighting

It is light added to a subject from the front or the side to reduce unwanted shadows and to level out harsh contrasts. This can be done using reflectors, bounce cards, or additional light sources set to lower intensity.

360° Ring Light 

A ring light attached to the camera lens gives all-around uniform lighting, ensuring uniform brightness along the total 360° circular motion.

Colored Lighting 

Your mood and atmosphere can be enhanced by adding a splash of color with the help of colored gels placed on your lights or using LED lights on your 360-degree photos. Make sure colors work well with your subject and do not draw the eye from the details.

Natural Lighting 

Utilize light from windows or skylights. They can give soft, flattering illumination that augments your subject's natural beauty.

Lighting Control

Flags, grids, or barn doors can be best used for directing and modifying the intensity of the lighting to achieve sculpting of the perfect lighting conditions for your 360-degree shots.

As much as these techniques are essential to 360-degree photography, they are equally fantastic skills practical for those working in graphic design, photography business, or any field where capturing beautiful ambiance light is vital. Mastering them will get you to create the most captivating 360-degree pictures ever.

Shooting Techniques

This is, therefore, our shooting time. If you wish to bring your e-commerce to a new and engaging level with your customers, you need interactive photography of the products. However, users can view products from any angle possible through 3D product visualization, giving them a comprehensive view that static images can never do. Therefore, let's proceed to the most exciting shooting techniques for 360-Degree product photography.

Preparing the Product 

  • Before you take any shots, make sure that the product is spotless and free of any dust or fingerprints. 
  • In 3D product visualization, the tiniest imperfections seem to appear very magnified, so your product should be clean. 
  • Place your product on a turntable that smoothens and evens out the rotation.
  • It also ensures that the turntable is firm in mounts and the product is centrally set to make it wobble-free during the shooting.

Camera Settings and Adjustments

Camera settings are also of utmost importance in product photography techniques.

  • Use a tripod to maintain stillness, and the camera should be set to manual mode.
  • Establish an ISO setting of low power (about 100-200) to keep noise under control, and pick a small aperture opening in the range of f/8 to f/16, which will help ensure a deep depth of field so that the entire product is in sharp focus.
  • The secret is constant lighting, so use diffused and soft lights to reduce shadows and reflections.

Positioning and Angles

  • Keep up with your camera's positioning to naturally generate an even rotation for the product.
  • Make sure your camera is at the same angle as the product and that your distance remains constant.
  • Mark the position of your camera and turntable to ensure perfect alignment in every shot.
  • To add excitement to your three-dimensional product display, shoot from different elevations and angles while continuing to maintain a systematic approach to this end.

Capturing Reliable Photographs

This is one thing that never comes off while doing 360-degree product photography.

  • Be sure to do this with a remote shutter release or timer in the camera because any shake may ruin the task.
  • The table needs to rotate in little, uniform increments—usually between 10 to 15 degrees—and an image should be shot each time the rotation halts.
  • This process will help compile a complete set of images that you can further interconnect to create a rotating, smooth footage.
  • It is important that one keeps on observing the frames with attention to expositional and focal elements in relation to one another.

By applying these product photography techniques, you will be in a position to develop 3D product visualizations that sell, and the overall shopping experience offered to the consumers will indeed be heightened.

Post-Processing and Editing

Post-processing and photo editing are some of the most critical stages in ensuring subsequent images are clear, professional, and impressive. Proper post-processing will show raw photos in a manner that captures all the possible product details, thus attracting prospective customers. Here are some good post-processing and editing tips:

Importing and Organizing Photos

The very first step to post-processing is photo import and organization. This action should ensure a smooth, well-organized workflow with easy access for you to implement post-processing on your images.

  • Create folder structure: Group your images by product name or SKU. This helps to find files quickly during the editing process.
  • Use photo management software like Adobe Lightroom or Capture One to help you sort and tag your images.
  • Rename files using a consistent naming convention that makes identifying every image in the sequence easy, removing confusion.

Proper organization will save you time and reduce the chance of losing your important files.

Basic Editing Techniques

Once your photos have been sorted through, proceed to elementary editing techniques. These are the basics of improvements and features that will enhance and improve your photos. 

  1. Background Removal: Distracting background removal so your product will be in the focus. Edges will be refined to have a clean look.
  2. Adjust the exposure so that your photos are not too dark or too bright. Contrast can be increased for the products to stand out.
  3. White balance: Ensure you set the white balance on your image so that colors are natural and realistic.
  4. Crop and Straighten: Eradicate any undesired background; straighten the image so the product is in the middle of the frame.
  5. Sharpening: This is used to bring out the product's detail, making it appear sharp and clear.

These basic edits form an essential basis for further advanced editing techniques.

Advanced Editing for 360-Degree Images

The 360-degree product photography area is where advanced editing techniques shine, the methods that ensure your product images are seamless and thoroughly professional in appearance.

  1. Stitching and alignment: Use PTGui or Autopano Giga software to join individual shots into a single 360 view. Make sure that the images are aligned perfectly so as not to distort them.
  2. Do some retouching and cleaning up: use Photoshop to clone stamp and healing brush on any imperfections like dust or reflections that draw attention from the limelight of the product.
  3. Color Grading: Make sure you grade every image through; that way, they are all colored the same and make your visuals appealing simultaneously. This process will make your visuals more pleasing and, at the same time, maintain brand consistency.
  4. Make interactive: You can add interactivity by using hot spots and annotations over 360-degree photos, which highlight key features of your product. This can be achieved using special software applications like Marzipano or Pano2VR. 

In a nutshell, post-processing and editing are essential in both high-quality 360-degree product photography. From importing and organizing through basic and advanced editing techniques, these steps will guide you in creating a professional, appealing product image that makes customers want to buy it. Following such best practices, you can ensure that your 360-degree photos are technically correct and visually engaging to make your customers buy from you.

Case Studies and Success Stories

Marketing strategies today are hugely driven by 360-degree Product Photography, as can be understood by numerous case studies that speak of its success in any industry. Let's take some examples to understand what differentiates it from others.

Examples from Diverse Industries

360 product photography has already been used in a vast industrial area, making it relatively straightforward because of its versatile application and convincing efficiency. Here are the standouts:

  • Fashion: Online retailers like ASOS and Zara have assumed a 360-degree product view whereby potential buyers can view clothes from all angles. It has significantly reduced returns, unlike before, when consumers did not get exactly what they had in mind.
  • Automotive: Car manufacturers use 360-degree photographs of their cars and display them on their websites, such as Tesla and BMW. Also, customers would get the feel of interactivity in terms of the exterior and interior detailing. If this happens, customer engagement goes up, and so will the conversion rate.
  • Home Furnishings: Companies like IKEA and Wayfair use 360° photos to sell the idea of home furnishings to their customers. Such interactivity attached to the shopping experience has been proven to boost customer confidence and, at the same time, mount sales.

Analysis of Effective Campaigns

To really appreciate the effect of 360-degree product photography, let's break down a few successful campaigns:

  • Nike's Sneaker Launch: The brand's new series of sneakers, was finally launched, and with the latest 360° photography, they could be seen from all angles to get in and see all of its minute detailing. The campaign resulted in 25 % more online sales and much shouting on social media.
  • Amazon Product Pages: The addition of 360-degree views on oversized ticket items like electronics and major home appliances increased Amazon customer satisfaction by 20% and significantly reduced product return rates.
  • Rolex luxury watches: Rolex campaign In one collection of the brand, 360-degree views of these new time watches add to the assurance that whoever potential buyer catches a glimpse of what the real-life shopping experience would feel like. This did not bring more traffic to the website but resulted in 15% more sales.

Learned Lessons and Good Practices

How to effectively implement 360-degree product photography:

  • High-Quality Imagery: Make sure to provide good-quality images so that they can give a clear and more detailed picture.
  • User Friendliness: It is most appropriate to make the interactive features conspicuous so that clients are able to manipulate them.
  • Integration with Marketing Campaigns: 360° photography integrated into other teams' planned marketing campaigns, including those for social media and email campaigns. 
  • Customer Retention: Regularly collect and analyze customer feedback to improve the interactive experience. 

In short, 360° product photography represents more than just a fad; instead, it is a powerful tool for improving online shopping experiences. Reap benefits similar to these from case studies and adopt best practices to better customer engagement, reduce return rates, and ultimately bolster sales.

Tips and Tricks for Stunning Visuals

Imagine being able to pick up your product virtually, rotate it around, and look at all details—thus, from the comfort of their couch. 360° photos increase engagement, raise conversions, and build trust with your brand. So, how do you take a breathtakingly amazing 360° product shot? Here are some tips and tricks I've learned through experience which can 635 enhance your product presentations and make the competition envious.

Making Better Clarity

The primary thing in 360-degree product photography is image quality. High-quality images capturing all the fine details and textures of the product make the product look more attractive to the viewer. Therefore, here is how to achieve the best image quality:

  • Invest in Good Equipment: Besides employing a high-resolution camera, you need to use a good lens camera. You should look to get a camera with a large sensor size; that just means more clarity and depth of the image. 
  • Proper Lighting: It has to be soft and diffuse and not create violent shadows or highlights. Avoid so-called marked contrasts by using various LED light panels or soft boxes that provide the most constant possible lighting.
  • Stable Setup: Make sure you use a sturdy and stable tripod. A motorized turntable will help to ensure you get consistent, stable images; stability is the key to not getting blurry shots.

You will then advance from the essential tools to the advanced techniques.

Creative Techniques and Innovations

Some creativity and innovation can take your 360-degree product photography to the next level. Now, how to add some creativity?

  • Background Variety: Experiment with a few different backgrounds and see what will work well with the product. The clean white background is versatile; think, however, also about thematic backgrounds that will appeal to the product's branding.
  • Post-Process: Use Adobe Photoshop or Lightroom post-process software. Adjust brightness, contrast, and color balance to make your images pop.
  • Interactive Functions: Add options for zoom and hotspots so the user can look into details and gather more information on a specific zone of the product.

Creative techniques do not just help enhance your visuals; they make the visuals appeal to customers and become unforgettable.

Troubleshooting Common Issues

Though you are very well prepared, you might still have problems with taking your photographs. Here is how you are going to troubleshoot common issues:

  • Blurred Photos: Ensure your camera is stable. Utilize a remote shutter release to avoid shaking as much as possible. Reduce your shutter time if necessary.
  • Inconsistent Lighting: Always double-check your lighting setup before making any shot. Make your lighting setup the same for all the shots you take.
  • Color Accuracy: Use color checkers or a gray card to set a finely custom white balance. This way, it ensures that the colors in your photos are accurate. 

You will, therefore, be able to tackle these common issues beforehand and maintain quality in your 360-degree photographs.

Keeping Up with Trends

Product photography is a fast-evolving field, and new trends, along with technology, come up every other day. Staying updated can give you a competitive edge: 

  • Read the Industry Blogs and Forums: Engage with the photography community by reading through blogs, forums, and social media for the latest in trends and techniques. 
  • Attend Workshops and Webinars: When an industry expert offers workshops or webinars, do attend them. These are informative and interactive sessions. 
  • Experiment with New Technologies: For instance, artificial intelligence can be integrated into the whole photo editing process to take it a notch higher. It helps make your process of photography so much better. 

You make your 360-degree product photography dynamic and impactful by constantly refreshing your skills and knowledge.

EndNote

Congratulations! You have just learned all the secrets to creating amazing 360 product images. You are all set now to make some of the most astounding and engaging customer experiences for your products and slay the audience with a high impact of visuals. After all, compelling visuals are grounds for exceptional brand identity.

But the journey doesn't end here. You know that high-quality visuals are very essential for the brand to succeed. But what if you want to go one step further?

All this can be taken to the next level with a professional graphic design agency like Graphic Design Eye. With a solid, experienced team, their professionals can influence from concept initiation to perfect execution. This will ensure that your 360-degree product photography is woven into your overall brand aesthetic, making the entire visualization one single experience for your viewers.

Allow our client management team to help you with product photography a real work of photography editing, which will boost your sales and further improve your brand loyalty. So, contact us for a free consultation today!

Leave a Comment

Your email address will not be published. Required fields are marked*